
Product Page Widget
Editing
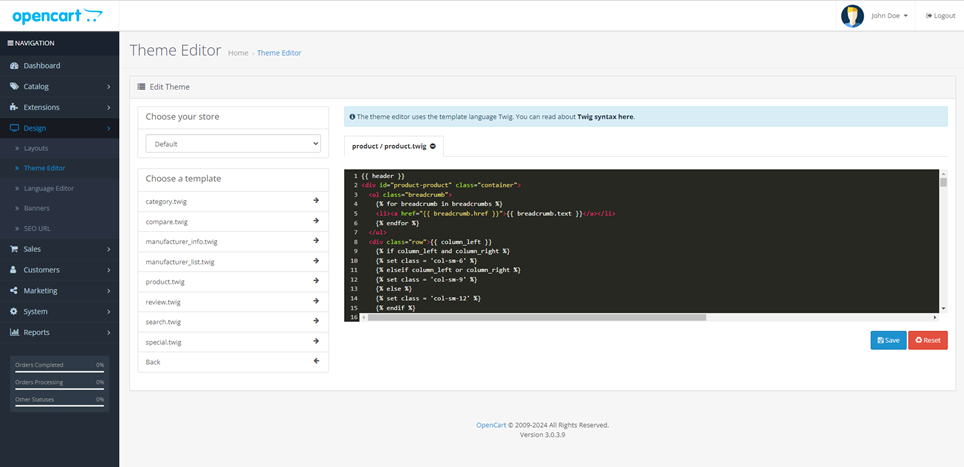
- Within your OpenCart Dashboard, navigate to your Theme Editor via Design
- Select product then product.twig
Adding
- Within the product.twig file, locate the section of the file where the price is displayed (CTRL+F "price")
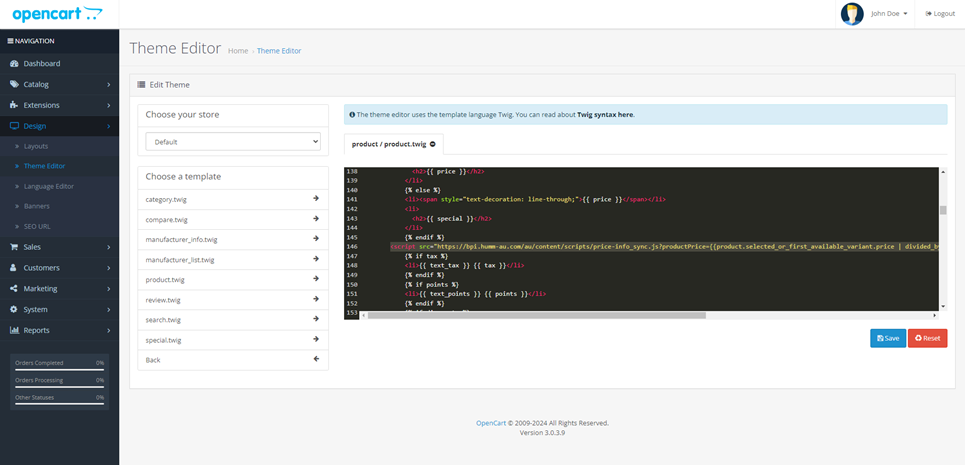
- Paste the following script in your product.twig under the price section:
<script src="https://bpi.humm-au.com/au/content/scripts/price-info_sync.js?productPrice={{product.selected_or_first_available_variant.price | divided_by:100.00}}&merchantId=YOUR_MERCHANT_ID"></script>
Important!Replace YOUR_MERCHANT_ID with your humm Merchant ID
{% if price %}
  <ul class="list-unstyled">
    {% if not special %}
    <li>
      <h2>{{ price }}</h2>
    </li>
    {% else %}
    <li><span style="text-decoration: line-through;">{{ price }}</span></li>
    <li>
      <h2>{{ special }}</h2>
    </li>
    {% endif %}
    INSERT_WIDGET_HERE
    {% if tax %}
    <li>{{ text_tax }} {{ tax }}</li>
    {% endif %}
    {% if points %}
    <li>{{ text_points }} {{ points }}</li>
    {% endif %}
    {% if discounts %}
    <li>
      <hr>
    </li>
    {% for discount in discounts %}
    <li>{{ discount.quantity }}{{ text_discount }}{{ discount.price }}</li>
    {% endfor %}
    {% endif %}
  </ul>
{% endif %}
Above is an example of default theme where you would insert the widget (INSERT_WIDGET_HERE line). Themes do differ, though.
- Press Save to confirm the widget is applied.
- Preview your site to see your widget on your site.
Need help?If you require any help or have any questions, please reach out to us via the Integration Assistance Form
Updated over 1 year ago
Did this page help you?